Civil War Photography Inquiry High School Lesson Plan
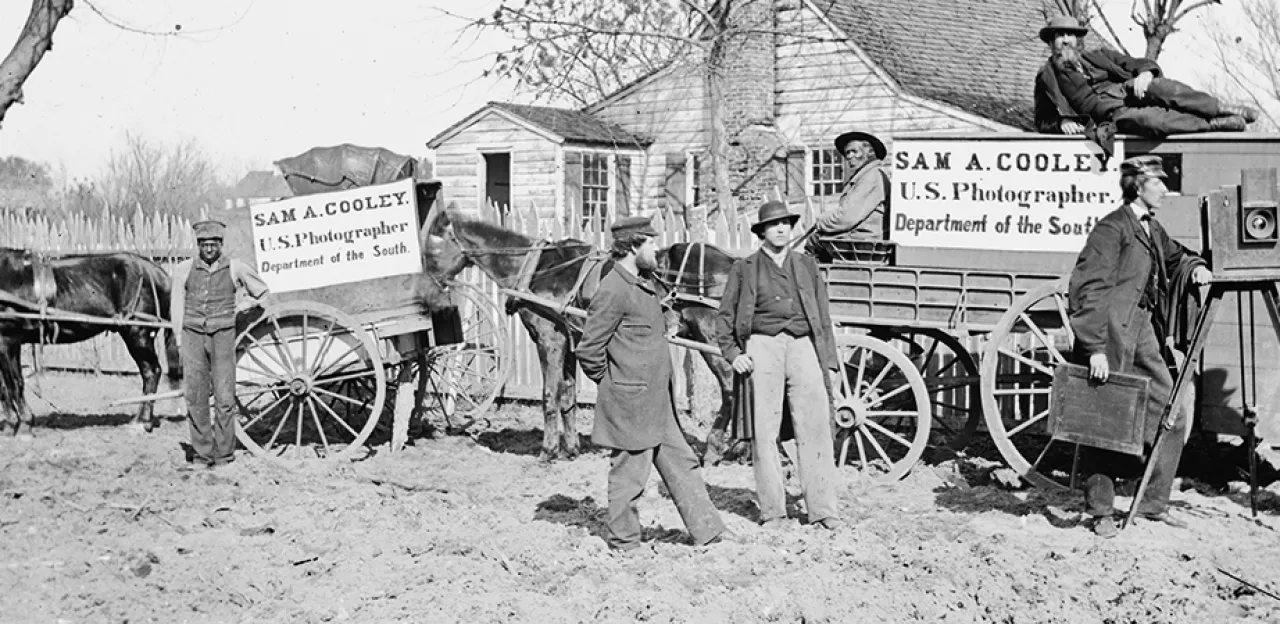
Wagons and camera of Sam A. Cooley, U.S. photographer, Department of the South.
Library of CongressThis lesson can be done with 3D photos or regular photos. Both have been provided. Order Your 3D Glasses »
Grades: High School
Approximate Length of Time: Approximately 45 minutes
Goals: Students will learn how to utilize primary sources to study an historic event.
Objectives:
- Students will be able to explain why photographs are a primary source.
- Students will be able to create a list of questions based on a historic photograph.
- Students will develop hypotheses for their questions related to a historic photograph.
- Students will conduct research, answers questions they posed and provide citations for their research.
- Students will create text accurately describing and summarizing a historic photograph.
Common Core:
CCSS.ELA-LITERACY.RH.6-8.1
Cite specific textual evidence to support analysis of primary and secondary sources.
NCSS STANDARDS FOR SOCIAL STUDIES:
2—Time, Continuity, and Change
8—Science, Technology, and Society
Materials:
Download the lesson plan, along with the following materials, at the bottom of this page.
- Photography as a Primary Source Notes/Graphic Organizer
- Photography as a Primary Source Notes/Graphic Organizer (Example)
- 2D and 3D Photographs
- Optional: A older photograph of the school or portion of town that most of your students would be familiar with, as well as a modern or current photograph of the same place.
Additional 3D Materials Needed:
- 3-D glasses
Vocabulary:
- Primary Source - a document, account, or object created during a historic event, which is then used to study that event or time period.
Anticipatory Set/Hook:
Ask your students, "Have you ever looked at old pictures of your parents or grandparents? Is there anything you notice in these pictures? (hair, clothes, places)"
*If you have brought in pictures, show them to your students. Compare the images. What has changed? What has stayed the same? What can we learn about the history of this place based on the changes we see?
Ask your students, "Do you think looking at old pictures can tell us things about the past? What is something you could learn about the past when looking at an old photo?"
Explain that today they are going to be looking at old photographs to look for clues about the past.
Photographs from the historic time period are a primary source.
Procedure:
For the procedure use the Photography as a Primary Source Notes/Graphic Organizer.
Introduction:
Explain that the Civil War was the first major war to be documented using photography.
Explain that today historians use photographs from the Civil War to study the war. They find clues about who was there, what equipment was used, what the landscape was like, and even how people behaved. We can learn about the war by studying these photographs as well.
Today, we are going to study a photograph as a historian would. We are going to ask questions, look for clues, and find answers. We are then going to create a short and accurate summary of the historic photos so that other people can learn about it and for future research purposes.
Activity:
Be prepared to scaffold this lesson for your students. A sample Notes/Graphic Organizer has been provided for the 2D photo #1.
Scaffolding Ideas:
Novice:
- Do the Notes/Graphic Organizer step-by-step with your students, preferably on the smartboard so they can all see you notes and research process.
- For “Questions I have about this photograph” Explain your questions and thought process on how you came to ask those questions.
- Go through your hypotheses to your questions. Explain that these are educated guesses based on some knowledge you already have or clues in the photo.
- Go through how you conduct research to find answers to your questions.
- Check and see how your hypotheses helped get you towards some of your answers.
- Complete the summary with your students.
- You can do this with one photograph as a group as your full lesson. You can also do one as a model and then do one photograph together as a group.
More Advanced:
- Using a smartboard, do the Notes/Graphic Organizer together for one of the photographs. Allow your students plenty of think-time to develop their questions. As a class list out the questions you have about the photo.
- Have your students think about their hypotheses based on what they see and might already know. Write down the hypotheses.
- Have students suggest ways to find answers to their questions. Go through the questions and find answers. Model how you can provide a link to help cite the resource you used.
- Go back and check out how the hypotheses helped direct the research.
- Students can write down their own summaries and share with the group.
Most Advanced:
- Break students into groups and give each the photographs as well as multiple copies of the Notes/Graphic Organizer.
- Have students choose the photograph they would like to work on.
- The group will then work together to do the Notes/Graphic Organizer. Each student should complete their own paper, but the content should be similar within the group. Historians at schools, museums, parks, archives, etc. often work together on a project.
- Students should provide links for all of their answers so that others can find their research.
- After each group has finished a photograph the groups should present their photo and research with the class.
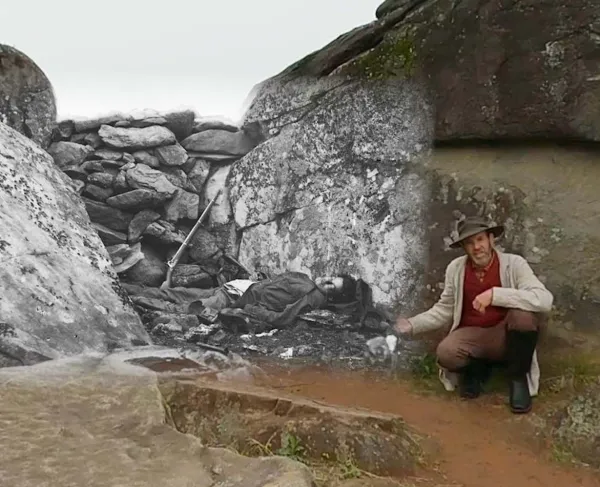
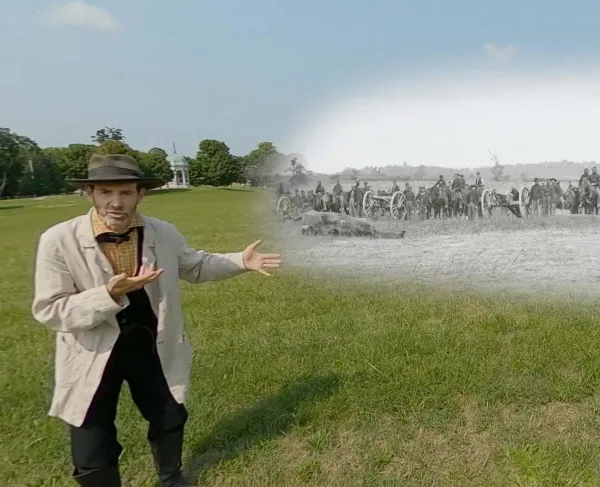
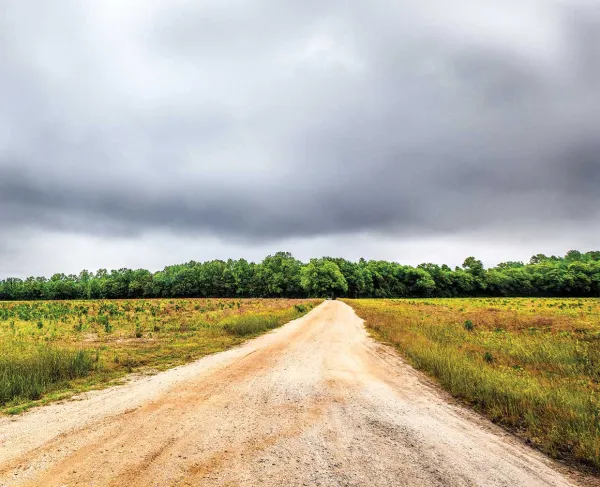
Here are the photographs for the lesson:
2D Photos - Photo #1 Photo #2 Photo #3 Photo #4
3D Photos - Photo #1 Photo #2 Photo #3 Photo #4
Closure:
Ask your students, "What did you enjoy most about this project?” “How can we use photographs to study the past?” “How are photographs unique from other primary source material?”
Assessment:
Gather students’ Notes/Graphic Organizer worksheets for your review.
Take notes during discussion. See who, when, and how students were participating.