Cowpens
South Carolina | Jan 17, 1781
A stunning example of military prowess and skilled leadership, the Battle of Cowpens near Chesnee, South Carolina, was a critical American victory in the Revolutionary War. This engagement further weakened British attempts to wrest the southern colonies from American control.
How it ended
American victory. After a string of bad luck in the Southern Campaign, the American army demonstrated its worth in a swift struggle that decisively hindered British forces in the South.
In context
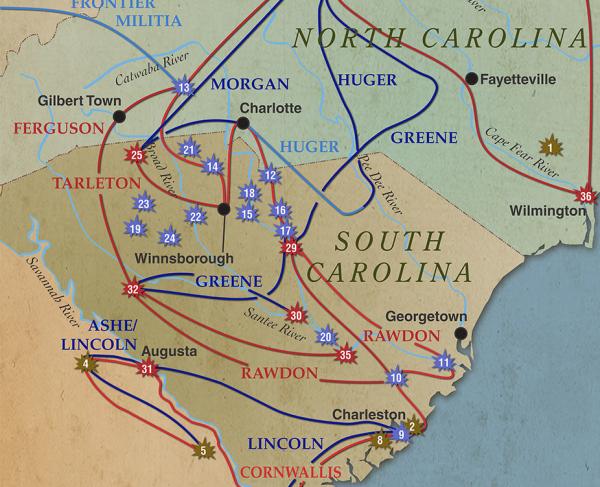
By late 1778, the British high command proceeded with their "Southern Strategy." Why did they choose this new “Southern Strategy?” Simply put, economics. The New England colonies produced many of the same products and goods as the British Isles, but the Southern Colonies were a different story. Rice, indigo, tobacco, and other cash crops abounded. Crops that could not be produced in the British Isles. The institution of chattel slavery helped to keep the wholesale prices of these products low, and British mercantilism could profit from cornering the market and selling the goods for substantial profits. Many leaders in London felt that the Southern people supported Toryism, and by default were more apt to take up arms as loyalists. These loyalist forces could be relied upon to bolster the British war effort lending manpower to an army that had been at war with their own colonists since 1775. However, in the South Carolina Low Country, British soldiers freed southern planters’ greatest source of labor and income—enslaved workers. While in the Backcountry, British officers used threats and intimidation against the population. Thus, by alienating the population, the British had difficulty rallying sympathetic allies to their cause, while exacerbating the civil war within a civil war. With little loyalist support, they faced greater challenges in battle as the campaign in the South continued.
The South Carolina backcountry turned out to be Britain’s undoing. The colonial population there was split between patriots and loyalists. The territory was essentially engaged in civil war, with neighbor pitted against neighbor. Both sides organized militias and engaged in armed raids and reprisals. Into this hostile arena, General George Washington sent Major General Nathanael Greene to take command of the Southern Army. Greene, just two weeks into his command, split his force, sending Brigadier General Daniel Morgan southwest of the Catawba River to cut supply lines and hamper British operations.
General Cornwallis, the British commander in the South, countered Greene's move by sending Lieutenant Colonel Banastre Tarleton to block Morgan's progress. Tarleton was only 26 years old, but he was already an able commander. He was also feared and hated. At the Battle of Waxhaws in 1780, Tarleton was alleged to have attacked Continental Army troops who were trying to surrender. His refusal of offering “no quarter,” is said to be the derivation of the derisive term "Tarleton's Quarter,” meaning “taking no prisoners.” Morgan’s brilliant victory over Tarleton at the Battle of Cowpens was humiliating for the elite British army officer. His loss directly contributed to Cornwallis’s defeat in the southern colonies, the British surrender at Yorktown, and American independence.
Lieutenant Colonel Banastre Tarleton, boosted by the British success at Camden and other victories, aggressively pursues American general Daniel Morgan’s forces through South Carolina. Confident that his 1,150 men will continue to be successful in the South, Tarleton chases Morgan without knowing how many men Morgan actually has at his side. Morgan, however, is well aware of the strength and location of his enemy. He readies his 1,065 men for battle.
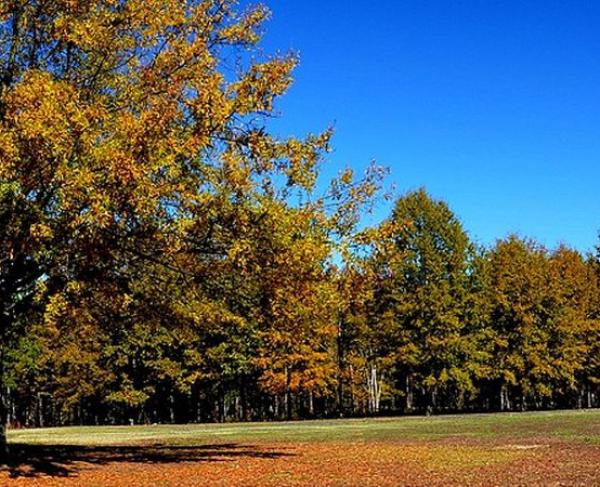
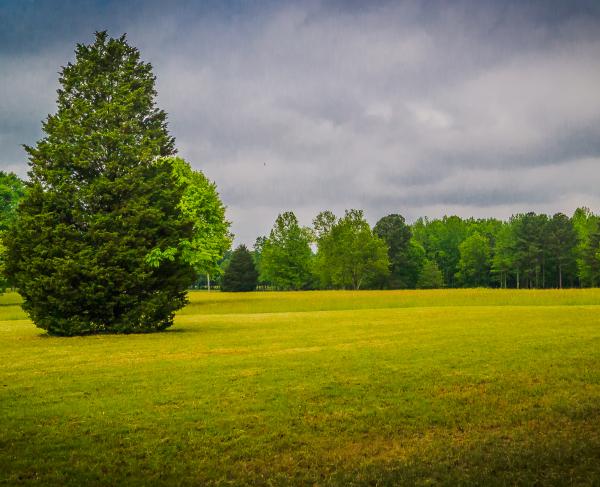
Tarleton’s early morning crossing of the Pacolet River on January 16 forces Morgan to abandon his campsite and fall back on Cowpens pasture near Thicketty Creek. This open, rolling woodland of first-growth pines and hardwoods is excellent country for cavalrymen but offers little cover for riflemen. The Americans find a slope ridge, which dips down to a shallow swale and rises again to a higher ridge. Just behind the crown of the second ridge is a deeper gully in which cavalry can be concealed. Morgan spends the evening moving from campfire to campfire, talking with his soldiers before combat and building their resolve.
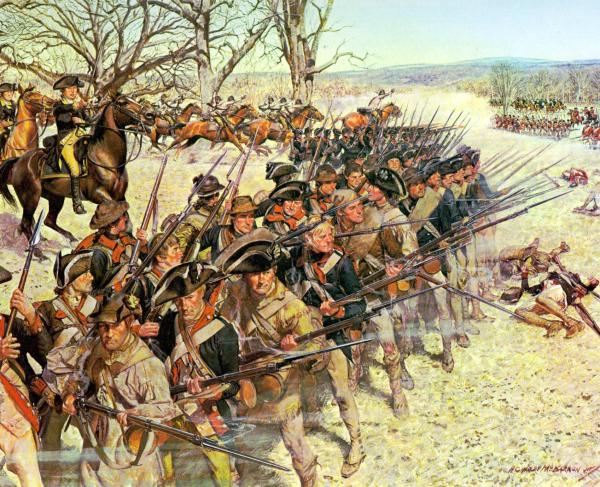
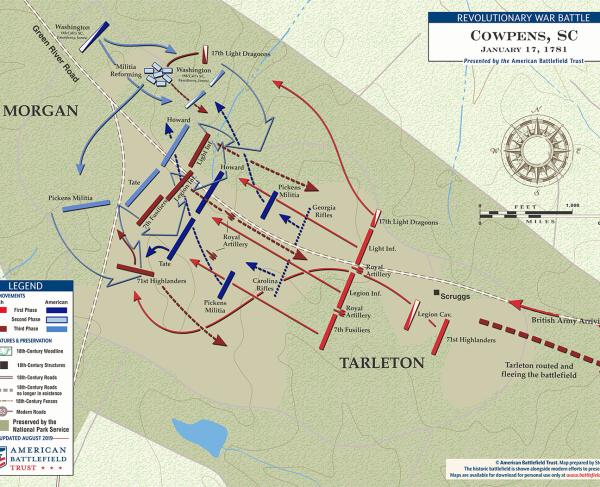
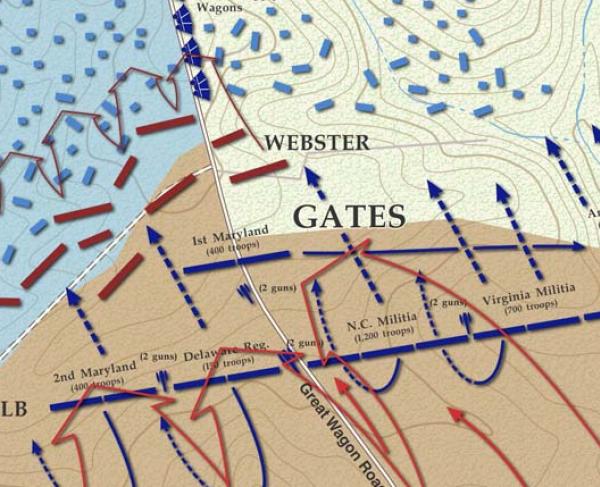
January 17. Near dawn that morning, Morgan’s men meet the British on wide-open South Carolina pastureland. Morgan knows his men and he knows Tarleton’s. Hoping to hinder any impulse among his troops to retreat, he positions his forces between the Broad and Pacolet rivers, ensuring a head-on encounter with the enemy. Morgan worries that his men could panic in the early stages of combat, as they had in the American fiasco at Camden months before. Boosting morale in his men and safeguarding their confidence with two rivers, Morgan takes a chance against Tarleton’s more disciplined and trained troops. Betting that Tarleton will employ typical British field battle tactics by lining up his men in a linear assault, Morgan deliberately leaves his flanks open, inviting Tarleton’s troops to take the bait.
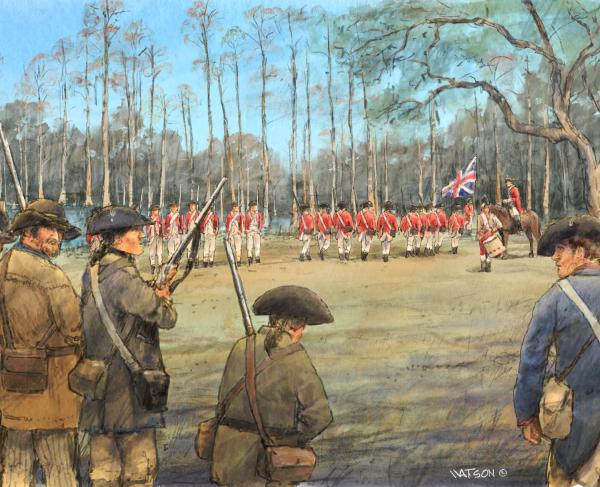
Morgan forms his defense into three separate lines: the first of skirmishers; the second of militia, and the third and last line consisting of the better-trained Continental Army units. He orders some trained men to be in first two lines and to shoot British officers first, so when the British get through the lines the Royal Army will be leaderless and disorganized. As the British advance, Morgan commands his militia in the second line to fire two volleys and then immediately retire to the rear of the line to fight in reserve behind the line of Continentals. This maneuver gives the impression that the Americans are fleeing, while at the same time concealing the third line, which can fire on British troops as they assault the hill. The arrangement works. The British suffer heavy casualties in the initial attacks. By the time they reach the third American line, they have fallen apart.
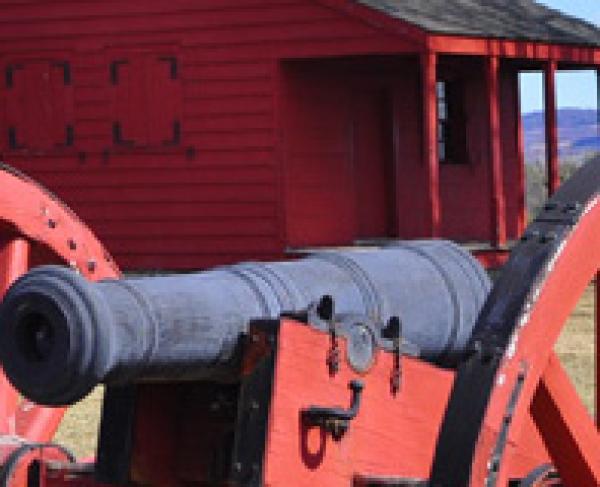
Depleted of officers, Tarleton’s men continue to try and press their advantage. An hour into the fighting, elements of Morgan’s Virginia Regiments fire point blank into the British as they attempt a feeble flanking move on the right. Just when the British assault is blunted, the Americans fix bayonets and plunge into the enemy. In the melee that follows, Americans seize the two small field pieces the British had brought along for artillery support. The British line crumbles with Regulars throwing down their arms and surrendering.
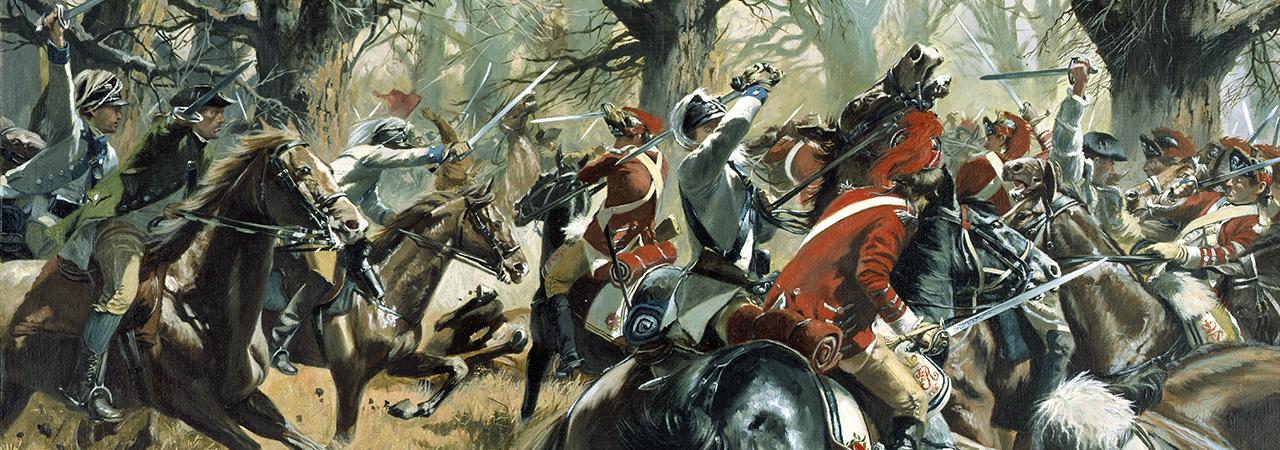
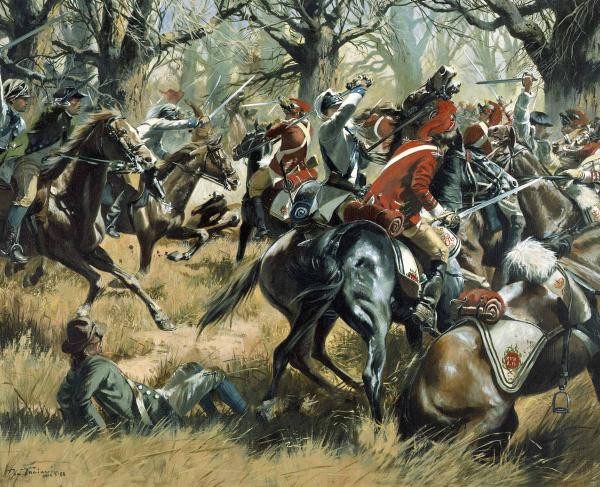
American cavalry advance from behind the third line to cut off the British, shocking and devastating the Royal Army soldiers left standing. Morgan orders 100 cavalrymen under William Washington (second cousin, first-removed to George Washington) to meet Tarleton’s men at the third line. Washington’s horsemen attack on the right and reformed militia from first two lines strike left, overwhelming Tarleton's frazzled troops. Those British who can, try to run—only to be hotly pursued by the American cavalry. Washington personally takes on Tarleton with his sabre, shouting insults as he attacks. Tarleton shoots Washington’s horse out from under him and, like his men, flees the field. By 8:00 am the battle is over.
149
868
After the battle, Morgan buries the dead, and, with many British prisoners in tow, heads north to avoid an encounter with Cornwallis. He later retires from duty due to ill health.
After Cowpens, Cornwallis gives up on his efforts to win in South Carolina and pursues Greene’s force into North Carolina. He defeats Greene at the Battle of Guilford Court House in March, then withdraws to Virginia to rest and refit his tired and depleted army. Washington seizes the opportunity to trap and defeat Cornwallis at the Battle of Yorktown, which is the last major conflict of the Revolutionary War.
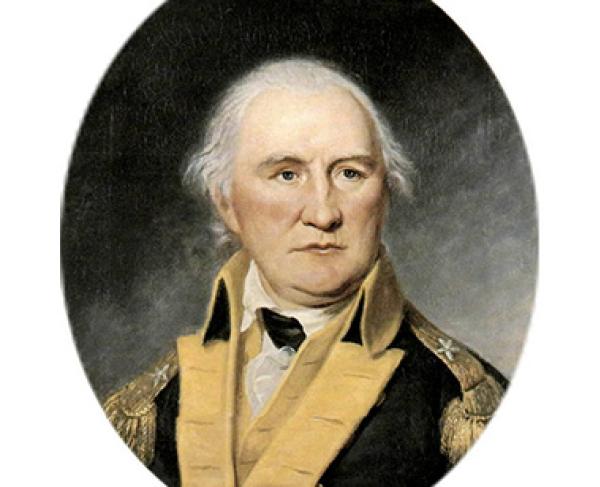
Part rebel and part brilliant battle tactician, Daniel Morgan was an experienced and respected officer who could think outside the box when it came to warfare. He moved to the Virginia frontier as a young man and served in the British Army as a wagon driver in the French and Indian War, for which he earned the nickname “Old Wagoner.” During that time, a fight with a superior officer resulted in a 500-lash punishment, which Morgan miraculously survived, but the incident forever turned him against the British.
When the patriots lay siege to Boston at the start of the Revolutionary War, Morgan marched his company of crack riflemen from Virginia to New England in just 21 days. His force of southern frontiersmen gained a reputation for fighting hard and shooting straight. Their untraditional uniforms—hunting shirts that made them look savage—intimidated the British Regulars, who learned to fear their accuracy. Morgan’s ability to rally his troops and outwit Banastre Tarleton at Cowpens reveals his ingenuity, skill as a commander, and courage. He never lost the grit developed on the frontier.
Eighteen years younger than Morgan, Banastre Tarleton grew up in Liverpool, England, where his father was mayor. The affluent and brash young man attended Oxford University and studied law before purchasing a commission in the British Army and sailing for America. Tarleton was courageous and daring and quickly rose up through the ranks. By the spring of 1780, he had taken command of the British Legion, a unit that consisted of loyalist recruits from the middle colonies.
During Cornwallis’s Southern Campaign, Tarleton played an active role in the battles of Monck’s Corner, Charleston, Waxhaws, Camden, Fishing Creek, and Blackstocks. For allowing his dragoons to fire on patriot soldiers who had already laid down their arms in surrender at Waxhaws, Tarleton earned the moniker “butcher.” After the defeat at Cowpens, his own superiors felt he lacked “military maturity.” Still, he was allowed to accompany Cornwallis to Yorktown and was later paroled to England, where he became a member of Parliament. Tarleton was a well-trained, relentless, and powerful adversary, with many military successes to his credit. But when confronted at Cowpens with Morgan’s frontier savvy, bond with common soldiers, and imaginative battle scheme, his skills as a leader and strategist came up short.
Many questions and much recrimination against Tarleton followed the battle. Why did he not first use his artillery? Why did his calvary not outflank and envelop Morgan? Why did he attack the rested patriots so quickly after marching 12 miles at night without food? Tarleton requested a court martial to decide the Cowpens blame and threatened to resign unless exonerated. Cornwallis responded on January 30, completely excusing his valuable officer, and asserting that “only the troops’ misbehavior could have deprived the glory.”
Wayne Lynch, a contributor to the Journal of the American Revolution is among the many historians who believe that Tarleton is largely at fault for the defeat at Cowpens and cites remarks by Lieutenant Roderick MacKenzie, one of the British officers wounded at Cowpens:
Many agree that Tarleton’s biggest mistake came from mishandling his cavalry. Mackenzie felt this was “the most destructive” of all Tarleton’s errors. Tarleton failed to see the developing problem in his center and didn’t summon the reserve cavalry until late in the battle. Many of the reserves were rebel turncoats who had experienced defeat only seven weeks earlier at the Battle of Blackstock’s Farm. By the time Tarleton finally called them to join the fight, they had lost their nerve.
Cowpens: Featured Resources
All battles of the Southern Theater 1780 - 1783 Campaign
Related Battles

1,065
1,150
149
868